How to Cook the Perfect Steak
"Steaks are a rare medium well done"
There's something deeply satisfying about preparing a perfectly cooked steak at home. Whether you're treating yourself after a hectic week or hosting a special dinner, mastering this culinary skill will serve you well. The beauty of a great steak lies in its simplicity - quality ingredients and proper technique are all you need. Let me guide you through the process from start to finish.
You Will Need ...
Tongs
Cast iron pan or a good quality frying pan will suffice
A spoon
A timer, your phone, or an Alexa works fine!
Steak of your choice
Vegetable oil
Plenty of butter - or ghee is also delicious
Fresh garlic, half crushed (1 clove per steak - optional)
Sprigs of rosemary or thyme (1 per steak - optional)
Choosing Your Steak
The foundation of a perfect steak begins at the butcher's counter. For best results, look for cuts with good marbling (those little streaks of fat running through the meat). These melt during cooking, keeping the steak moist and enhancing flavour.
Popular cuts include:
Ribeye: Rich, tender and well-marbled
Sirloin: Great balance of flavour and tenderness
Rump: More affordable with robust beef flavour
Fillet: Supremely tender but less flavourful
T-bone: The best of both worlds with sirloin and fillet on the bone
When possible, choose dry-aged beef for deeper flavour. British beef tends to have excellent flavour, particularly grass-fed options. Thickness matters too - aim for steaks at least 2-3cm thick for better control over doneness.
Preparation is Key
Proper preparation makes all the difference:
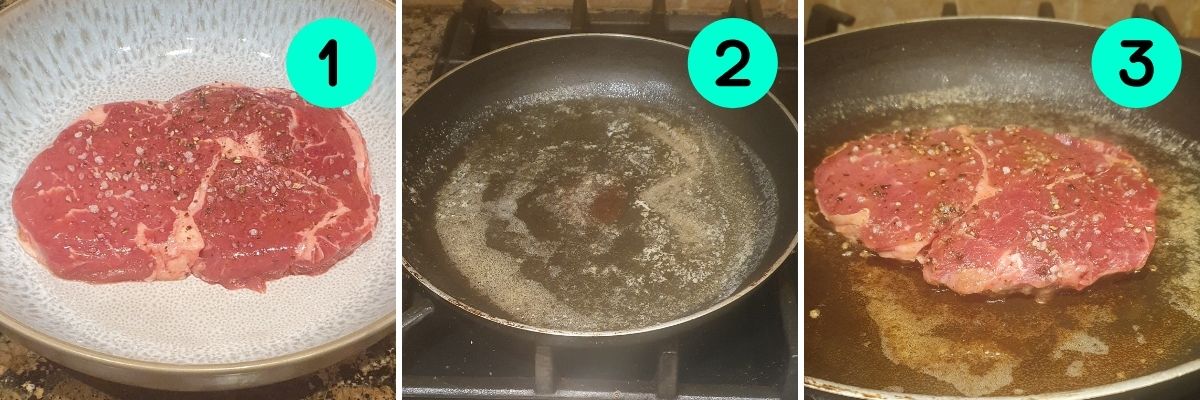
Remove your steak from the fridge at least 30 minutes before cooking. Cold steak straight from the refrigerator will cook unevenly and make it chewy. Also bear in mind that the cooking time won't be long, so make sure your side dishes are ready to go before you start on the steak.
Pat the steak thoroughly dry with kitchen paper. This step is crucial - moisture on the surface will create steam, preventing proper browning and that delicious crust we're after.
Rub both sides of the steak with a decent vegetable oil.
Season generously with good quality sea salt and freshly ground black pepper. Don't be shy with seasoning; much of it falls off during cooking. You can do this before or after the steak rests - I do it before, for maximum flavour.
The Cooking Process

Now for the main event!
Step 1
Choose the right pan - a heavy-based cast iron pan is ideal as it holds heat brilliantly. Make sure it's large enough to accommodate your steak/s without crowding. And don't forget the seasoning!
Step 2
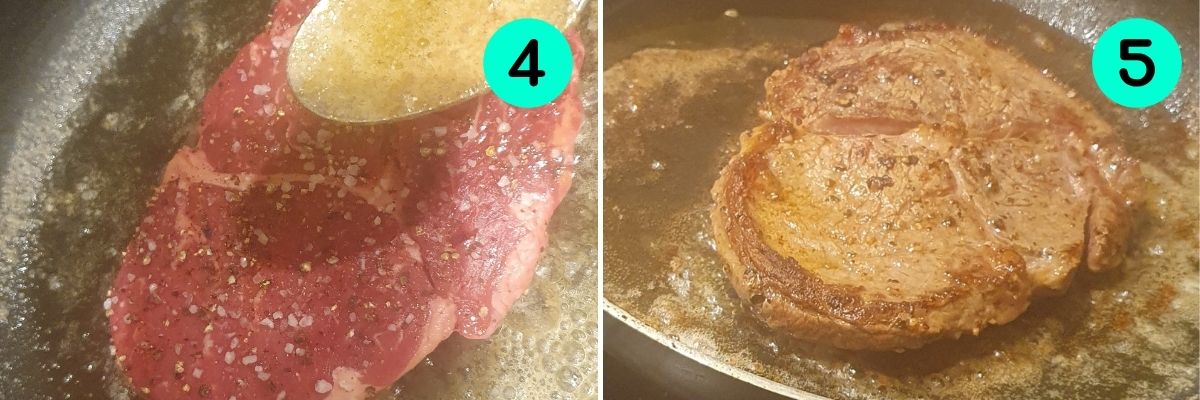
Heat your pan until it's smoking hot. This step cannot be rushed - a properly preheated pan is essential for developing a flavourful crust.
Step 3
Get your steak in the pan and use tongs to briefly sear the fatty edges of the steak, holding it upright against the pan for about a minute. This will melt the fat into the butter, adding even more flavour.
Let it cook flat and undisturbed for 2-4 minutes (depending on thickness) to develop a rich brown crust.

Step 4
Flip the steak and cook the other side for approx 2 mins - more on timings below.
When you flip, add a generous portion of butter. Vegetable oil will work too, but I would definitely recommend butter! At this point you want to start basting the steak - this is where you spoon hot butter over the meat continuously. Tilt the pan a little to make this easier.
As an option to enhance the flavour, throw in the garlic and fresh herbs when you flip the steak. These flavours will then be infused into the butter and meat as you baste it.
Step 5 - Timings
For a 2-2.5cm cut, eg sirloin:
Rare: 1-2 minutes per side
Medium-rare: 2 minutes per side
Medium: 2-3 minutes per side
Well-done: 4-5 minutes per side
For a 3-3.5cm cut, eg fillet:
Rare: 2-3 minutes per side
Medium-rare: 3-4 minutes per side
Medium: 4-5 minutes per side
Well-done: 5-6 minutes per side

The Essential Rest
Perhaps the most overlooked yet crucial step is resting your steak.
Transfer the cooked steak to a warm plate or cutting board.
Cover loosely with foil (not tightly or it will steam).
Rest for at least 5 minutes, or ideally half the cooking time.
During resting, the muscle fibres relax and redistribute the juices throughout the meat. Skip this step, and those precious juices will spill out when you cut into your steak, leaving you with a drier result.
Testing for Doneness
While timing guides are helpful, steak thickness varies, as do pans and hobs. The most reliable method is the finger test.
Relax your hand and press the fleshy area at the base of your thumb:
With thumb and index finger touching, that firmness equals rare
With thumb and middle finger touching, that's medium-rare
With thumb and ring finger touching, that's medium
With thumb and little finger touching, that's well-done
Compare this to how your steak feels when pressed with tongs.
Serving Suggestions
A perfectly cooked steak needs little embellishment. Classic pairings include:
Triple-cooked chips or a simple green salad
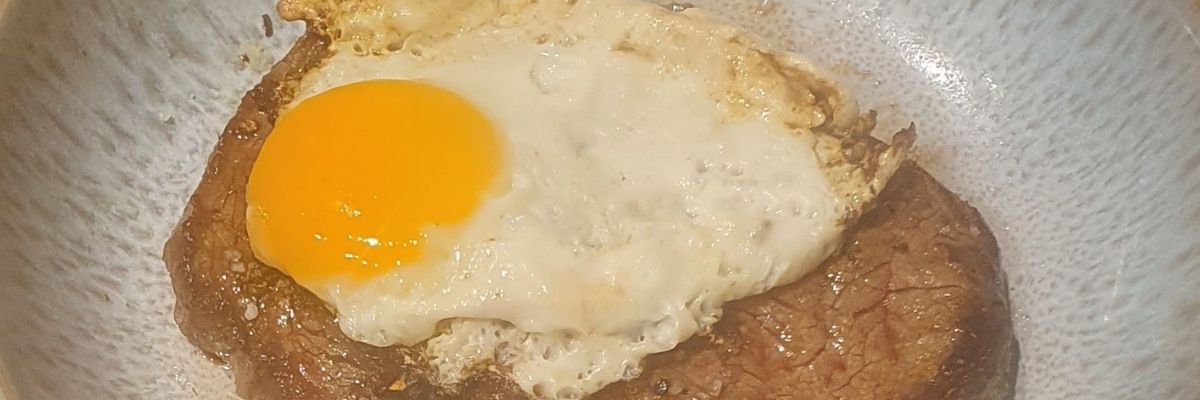
A fresh fried egg - my favourite!
Traditional sauces like peppercorn, béarnaise, red wine jus or, Freya's personal fave, blue cheese!

Troubleshooting Common Issues
If your steak isn't turning out perfectly:
Grey and steaming rather than brown and seared? Your pan wasn't hot enough.
Burnt on the outside but too rare inside? Your heat was too high or steak too thick - try the reverse sear method, (slowly cook the steak at a low temperature then searing at high heat)
Tough texture? You may have overlooked the resting period or chosen a cut that benefits from different cooking methods.
With practice, you'll develop an intuitive sense for cooking the perfect steak. The process should be enjoyable rather than stressful - and even if your first attempts aren't restaurant-quality, they'll likely still be delicious. Remember that each steak is different, and adjusting your technique based on the specific cut and thickness is part of the joy of cooking.


